Master Three Easy Steps to Preserve Your Blossoms
Posted on 27/06/2025
Master Three Easy Steps to Preserve Your Blossoms
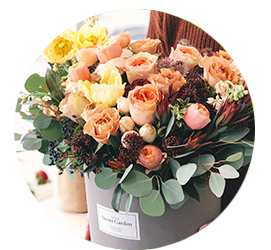
Flowers capture ephemeral beauty. Whether it's a bouquet from a special occasion, garden blooms, or wildflowers, their vibrant colors and delicate shapes invoke memories and feelings of joy. But fresh blossoms fade rapidly, leaving us wishing there was a way to make their beauty last. Fortunately, you can preserve your blossoms and keep their charm alive far longer than nature intended. In this comprehensive guide, we reveal three easy, proven techniques to preserve flowers at home. With step-by-step instructions, tips, and expert advice, you'll soon become a flower-preserving pro!
Why Preserve Your Blossoms?
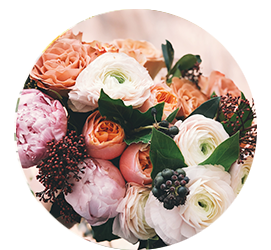
Preserving flowers isn't just about extending their lifespan. It's about treasuring memories--a wedding bouquet, a birthday arrangement, or flowers picked by your child. Properly preserved blossoms can become stunning home decor, personalized gifts, or keepsakes packed with sentiment. Whether you want to enjoy their natural beauty for months or years, learning how to preserve your blossoms is a skill worth mastering.
Top Reasons to Preserve Flowers:
- Sentimental Value: Keep important memories alive.
- Decorative Accent: Create unique wreaths, bouquets, and crafts.
- Eco-Friendly: Reduce flower waste and reuse natural resources.
- Gift Ideas: Handmade, preserved flowers make heartfelt presents.
- Educational: Great for teaching kids about plants and nature science.
What Flowers Are Best for Preservation?
Before diving into the three easy steps, it's essential to choose the right blooms for preservation. Some flowers maintain their color and structure better than others. Here's a list of flowers ideal for preserving:
- Roses
- Hydrangeas
- Baby's Breath (Gypsophila)
- Daisies
- Lavender
- Strawflowers
- Statice
- Carnations
- Pansies
- Delphiniums
However, don't be afraid to experiment! With the right method, you can attempt to preserve almost any blossom.
Three Easy Steps to Preserve Your Blossoms
Let's explore the best three easy flower preservation techniques you can master at home. Each method works for different types of blooms and achieves different visual effects. Select the technique that best suits your style and desired outcome.
Step 1: Air Drying--The Simplest Blossom Preservation Method
Air drying is the oldest and easiest method of preserving flowers. It's perfect for sturdy flowers and can be done with minimal supplies. Air-dried flowers retain a rustic, classic look--perfect for vintage decor or crafts.
How to Air Dry Blossoms:
- Prepare the Flowers: Remove any leaves from the stems. Keep the flowers in their desired shape.
- Bundle and Secure: Gather stems into small bunches--no more than 6-8 stems per bundle. Secure tightly with a rubber band or string.
- Hang Upside Down: Hang the bundles upside down in a dark, dry, and well-ventilated space. Closets or attics work well.
- Wait: Allow 2-4 weeks for the flowers to dry completely. You'll know they're done when the stems snap easily and petals feel crisp.
- Display or Store: Once fully dried, gently remove the flowers and use them as desired.
Tip: To preserve color, dry flowers out of direct sunlight. Some color fading is normal, but many blooms retain beautiful hues.
Step 2: Silica Gel Drying--Perfect for Vibrant, 3D Blooms
Want your blossoms to look as intact and vivid as possible? Silica gel preservation removes moisture quickly, locking in color and shape. This technique is ideal for roses, peonies, and delicate flowers with multiple petals.
What You Need:
- Silica gel crystals (available at craft stores or online)
- Airtight container (plastic or glass with a lid)
- Scissors
- Soft brush for cleaning
How to Use Silica Gel to Preserve Your Blossoms:
- Trim Your Flowers: Remove excess leaves and cut stems to the desired length (usually about 1 inch below the bloom).
- Prepare the Container: Pour a 1-inch layer of silica gel into your container.
- Position the Blooms: Place flowers face up, gently pushing stems into the silica. Carefully sprinkle more silica gel over the petals, ensuring the flower is fully covered but not squashed.
- Seal and Wait: Close the container and leave it at room temperature for 2-7 days, depending on flower size and thickness.
- Reveal Your Preserved Blossoms: Gently brush off any remaining crystals with a soft brush. The flowers should look bright and almost fresh!
*Extra Tip: Silica gel can be reused--simply dry it out in the oven according to the packaging instructions.*
Step 3: Pressing--Classic, Flat, and Elegant Blossom Preservation
If you love journals, scrapbooks, or botanical art, pressing flowers is the way to go. This technique flattens blooms between absorbent materials, perfect for cards, framed art, or keepsake books. Pressing works especially well for delicate flowers and petals.
Materials You'll Need:
- Heavy book or flower press
- Parchment paper, blotting paper, or coffee filters
- Scissors
How to Press and Preserve Your Blossoms:
- Pick at Peak: Choose flowers without blemishes or excess moisture. If needed, gently blot with a paper towel.
- Arrange Carefully: Place flowers between two sheets of absorbent paper. Arrange petals for your preferred look.
- Press and Wait: Insert the sandwiched blooms in a heavy book or flower press, adding more books for extra weight.
- Be Patient: Press flowers for 2-4 weeks. Check after two weeks for thin blooms, leaving thicker ones longer.
- Remove and Use: Carefully peel away the papers. Your blossoms are now press-dried--ideal for crafts, framing, or stationery!
Expert Hint: Use parchment or blotting paper, as some papers (like newsprint) can transfer ink or cause discoloration.
Extra Tips for Long-Lasting Preserved Blossoms
Once you master these three easy preservation techniques, you'll want your flowers to look their best for as long as possible. Here are some advanced hacks and maintenance tips:
- Keep Away from Direct Sunlight: Sunlight fades colors quickly. Display preserved flowers in shaded areas.
- Avoid Humidity: High humidity can cause mold or make dried flowers limp.
- Dust Gently: Use a soft brush or canned air to remove dust--never wash with water.
- Seal for Protection: Use floral sealant spray or hairspray for extra durability, especially for delicate air-dried or pressed blooms.
- Store Safely: When not on display, keep preserved flowers in a box lined with acid-free tissue to prevent damage.
Creative Uses for Preserved Blooms
Now that you've learned how to preserve your blossoms, let your creativity blossom! Consider these ideas for showcasing your long-lasting flowers:
- DIY Wreaths and Garlands: Create custom wall hangings or table centerpieces.
- Framed Botanical Art: Arrange pressed flowers in a glass frame for a modern look.
- Greeting Cards and Invitations: Embellish stationary with unique, flat-pressed florals.
- Jewelry Making: Encapsulate tiny dried petals in resin for necklaces and earrings.
- Memory Boxes: Place preserved flowers alongside photos and souvenirs for meaningful keepsakes.
Frequently Asked Questions: Blossom Preservation
How long do preserved flowers last?
Properly preserved blossoms can last from several months to years, depending on the preservation method, flower type, and storage conditions. Air-dried and pressed flowers may last 1-3 years, while silica gel-preserved blooms can last longer if kept away from moisture and sunlight.
Which flowers should I avoid preserving?
Very fleshy flowers (like tulips or lilies) contain a lot of water and can be difficult to dry without mold or shriveling. However, you can still experiment with silica gel or pressing, as some varieties (like lily petals) work well when pressed.
Can I preserve blossoms with hairspray?
Hairspray can be used to reinforce delicate dried or pressed flowers, adding a protective coating. However, it's not a substitute for actual preservation--make sure to dry flowers first, then lightly spray from a distance.
Is flower preservation safe for children or pets?
Preserving flowers is generally safe and fun for all ages. However, keep silica gel crystals away from pets and small children--these are not edible and should be handled with care.
Mastering Blossom Preservation: Conclusion
Preserving your blossoms is a delightful, accessible skill that helps you extend the beauty and sentimental value of your favorite flowers. By following these three easy steps--air drying, silica gel drying, and pressing--you can keep your most treasured blooms looking lovely year-round. Whether you're looking for a heartfelt gift, a new hobby, or a way to decorate your home with lasting elegance, flower preservation is a recipe for creative success.
So gather your favorite flowers, pick your preferred method, and start turning fleeting blossoms into everlasting beauty. With practice, you'll not only master how to preserve your blossoms, but also create one-of-a-kind keepsakes full of personal meaning and natural charm.
Preserve your blossoms today--and let their story live on!